The Rack
Written on January 4th, 2025 by Zach White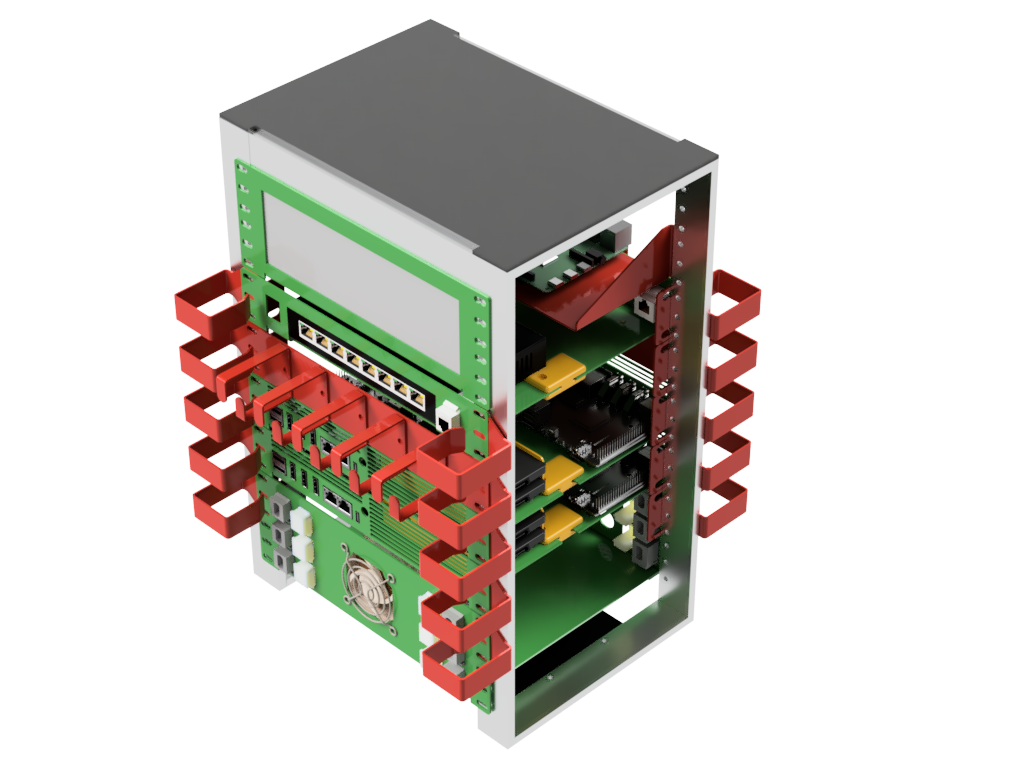
In this post I’m going to talk about my plans for tying the hardware together into a neat little package.
(ObDisclaimer: the Amazon links below are affiliate links, if you buy anything after clicking a link I will earn a small commission.)
Many people in IT who started their career before 2005 have spent some time in a datacenter, or around 19” cabinets and racks. While at first glance the picture above might look like a typical 19” rack, it is actually a “half rack”, which is 10” wide instead of 19”. This particular unit is an 8U half-rack made by Geeek Pi, and it is perfect for what I’m doing.
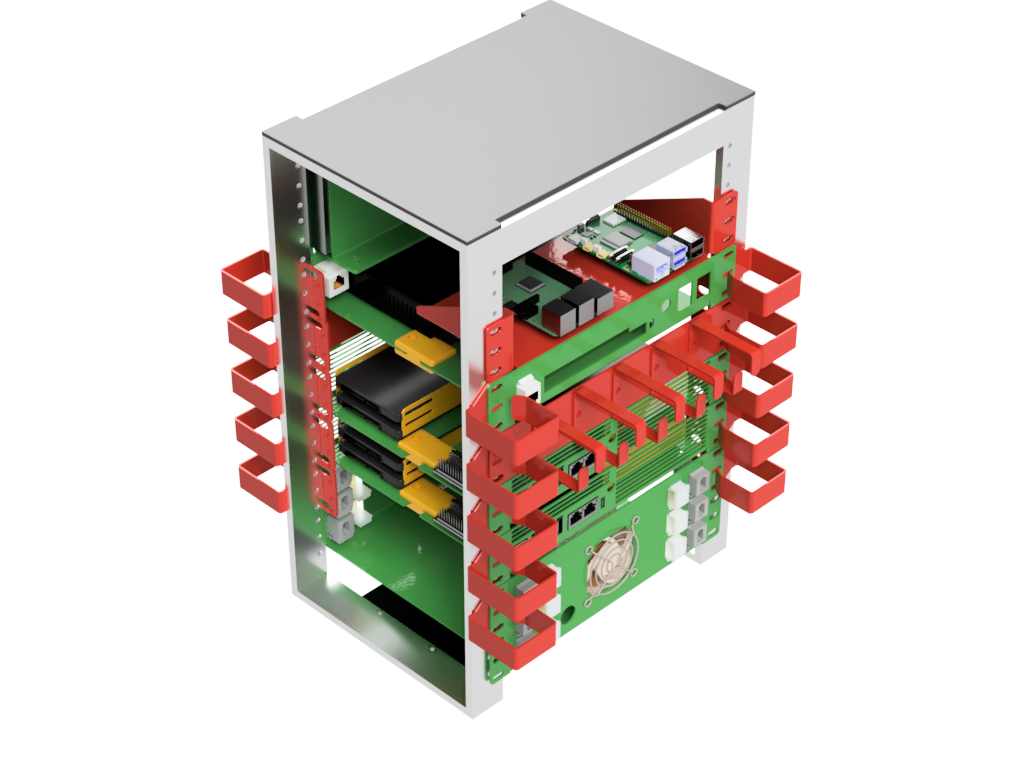
As you can see from the front and back pictures I have modeled my cabinet in 3d for planning purposes. Green parts are things I’ve designed and ordered from SendCutSend. The red parts are things I was able to buy off the shelf. Yellow parts are things I’ve designed but may, or may not, end up making. It will depend on how things are working once it’s put together.
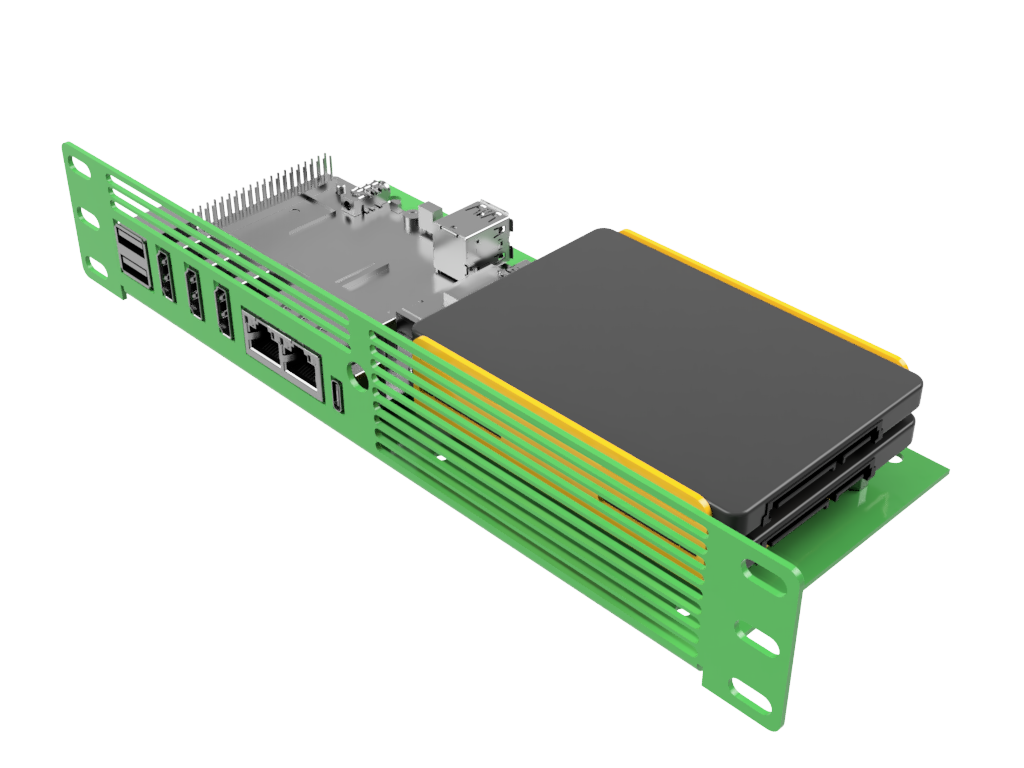
Taking a closer look at individual parts, this is my Orange Pi shelf. It fits entirely in half the depth of a 1U slot, allowing me to place one on each side. I can mount a single SATA SSD directly to the plate, or by fabricating the yellow bracket I can stack two SATA drives in that space.
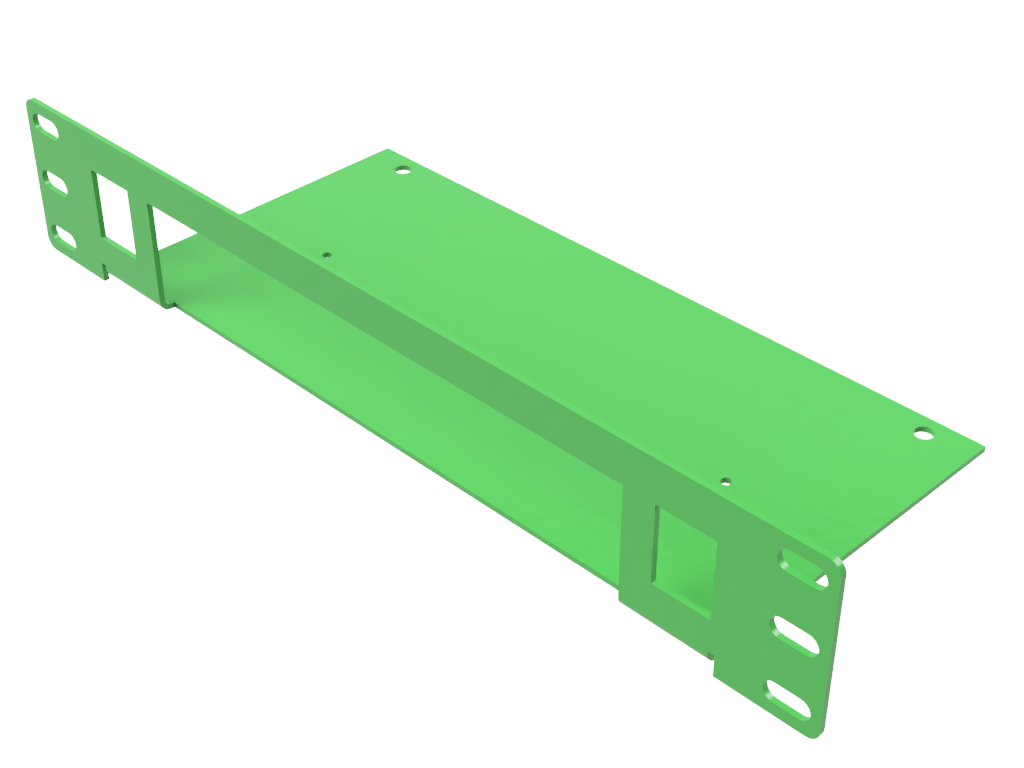
This is the shelf to hold my 9-Port 2.5gbe Switch. I settled on this switch because it offers some form of management, and it was fairly inexpensive. According to STH these cheap Chinese switches are all based on the same Broadcom reference design, and all perform to the best of their chipset’s ability.
With this shelf I can remove the outer case of the switch and I’m left with the bottom chassis and board. I can then use the existing holes on the chassis to screw the switch down to the case.

We have a similar story going on for the other side, except that I’m using a 6 port switch instead. The biggest difference here is that removing the case leaves me with only the PCB, so I have a more restrictive cutout to compensate. I will also be left with some gaps between the ethernet ports, but I think that will be minimal.
You may have also noticed the rectangular cutouts on both switch shelves. These allow for keystone jacks to be installed for cleaner wiring. I will also be using them to run the storage ethernet cables between the front and back panels.
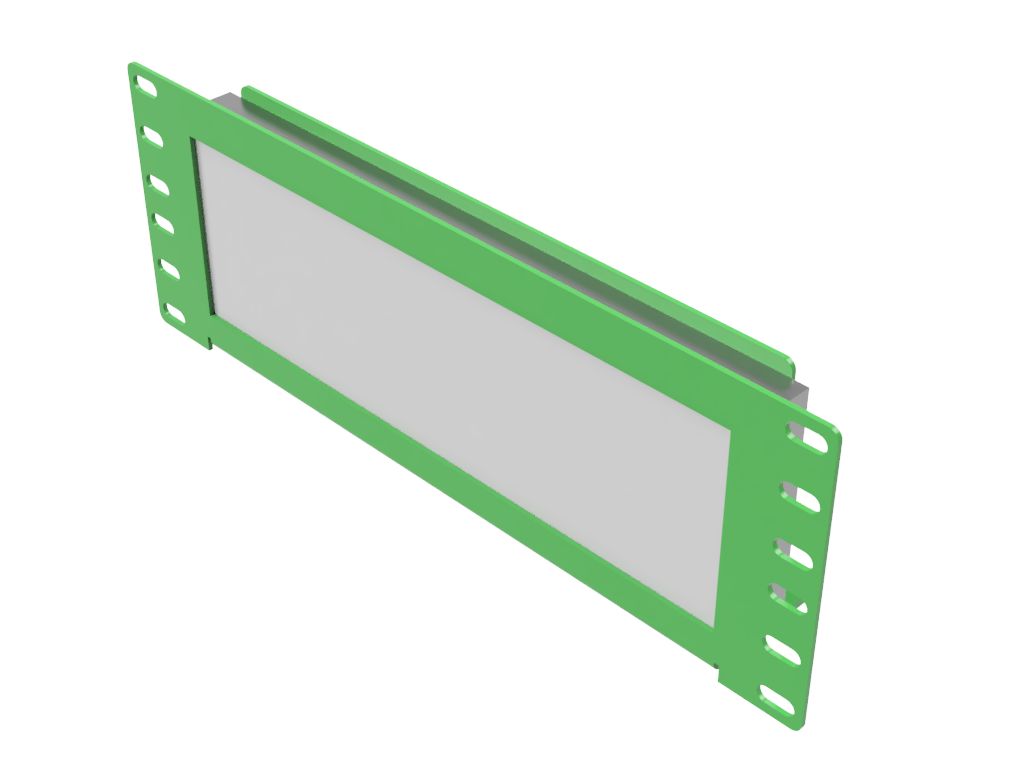
Next up is the screen that I’ll be displaying information on. I bought an interesting 7.84” 32:9 “Stretched Bar” LCD Display that fits rather nicely into 1RU. This gives me a 1280x400 HDMI display that I can use for anything I want.
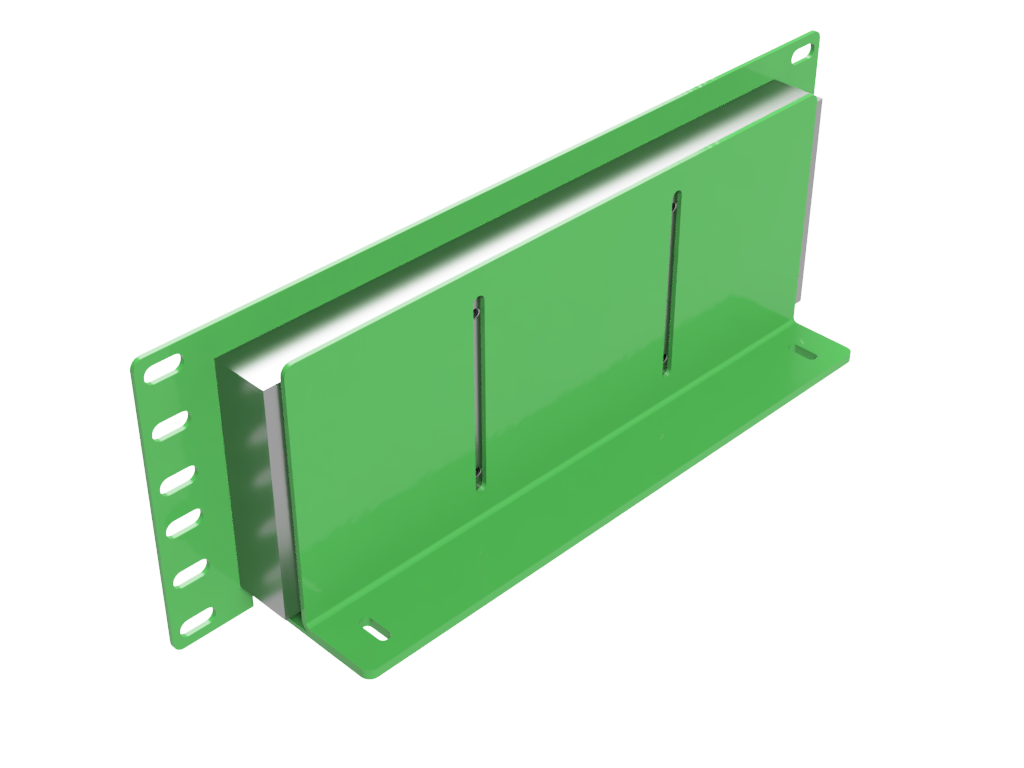
In order to mount it securely I have a plate in the back that utilizes the 4 “vesa mount” holes on the screen.
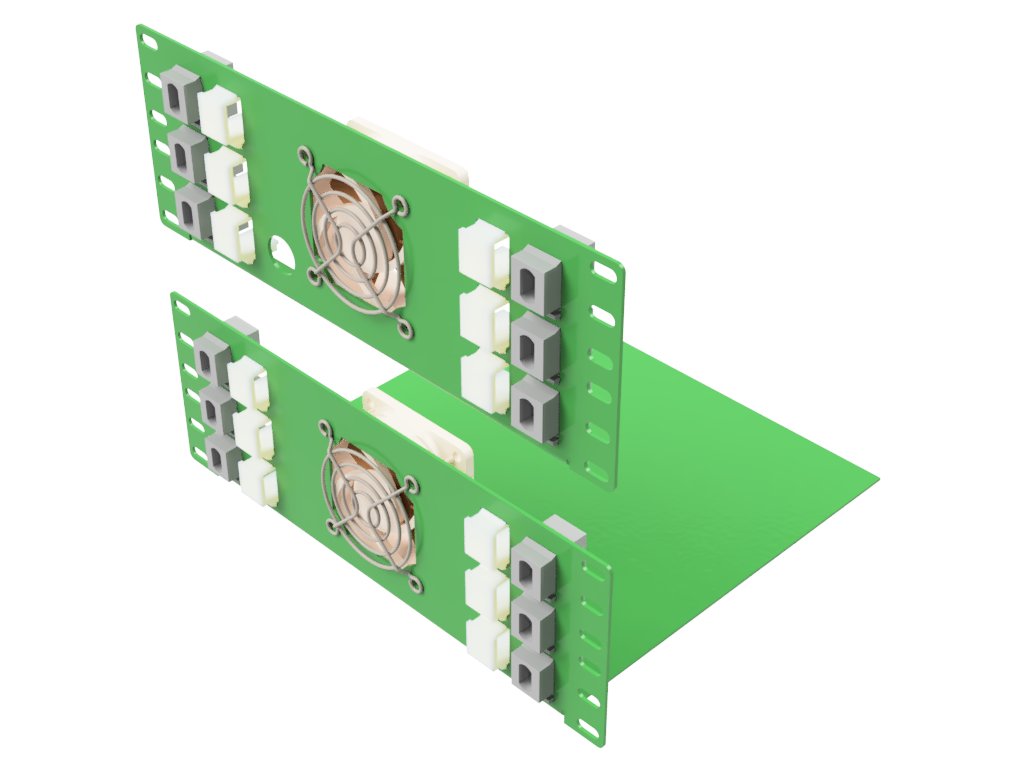
Rounding out my custom components are my PDU shelves. Figuring out how to power this rack without burning down my house has been a challenge, one I will write an entire post about. For now, let’s look at where I ended up.
To start, this is a front and back piece that work together. The lip on the back piece is slightly lower than the shelf on the front piece, so that it can hold the shelf level. There are cutouts for a fan in the center of each, with a finger guard over the front. I won’t populate the fan at first, but I will have the option available should heat build up in the PDU.
I have again used keystone jacks as my primary mounting system, this time for a combination of USB-c jacks and 12v jacks. This will allow me to keep the outside wiring limited to low voltage, and concentrate the 110v AC on the bottom of the rack.
I’ve found a pretty compact Power Strip with some USB ports on the side, and a powerful enough DC adaptor to eliminate some of my wall warts. The 4.1 amp available should be enough to power the Raspberry Pi 4 and the LCD screen, eliminating 2 wall warts. The rest of the plugs will be filled with 5 USB-C wall-warts and 3 12v wall warts- 2 for the network switches and 1 for the SATA drives.
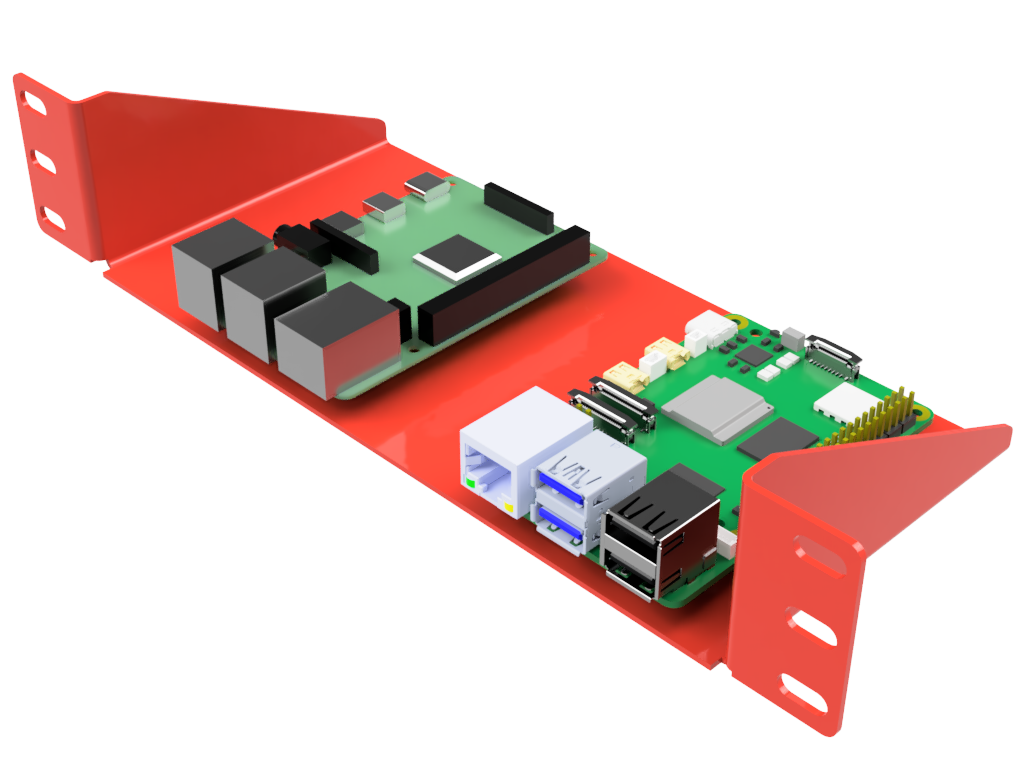
For completeness’ sake, this is the placeholder for my Raspberry Pi’s on the the SBC Shelf from GeeekPi. On that shelf I have a Raspberry Pi 4 whose sole purpose in life is to monitor the cluster and display information about it on the LCD screen. There is also the Raspberry Pi 5 which is running the k8s control plane. These boards being exposed to the world makes it not quite as clean as the Orange Pi shelves, but it came with the rack and it’s hard to beat free. Maybe one of these days I’ll design a front cover for it.

Wrapping up, let’s look at the overall rack again. You’ve likely noticed the red wiring management hooks all around. The vertical hooks I was able to buy off the shelf. The horizontal hooks I was able to buy off the shelf, but I have to do some work to mount them to a blank faceplate. Luckily the rack itself came with 3, so I’ll be able to fabricate the wiring management you see with only a little bit of work.
Discussions
If you have any thoughts about a topic I've written about, check out the GitHub Discussions. I’d be thrilled to hear from you.
